Getting Started on Windows
This guide walks you through setting up and running CyderVis on Windows.
Step 1: Install win-can-utils
win-can-utils is an open-source Windows port of Linux’s can-utils.
It provides the backend required for interfacing with your CAN adapter on Windows.
Follow the installation and usage instructions in the official win-can-utils README.
Step 2: Download and Run CyderVis
-
Visit the CyderVis Releases page on GitHub.
-
Under the latest release, expand the Assets dropdown and download the Windows
.zippackage.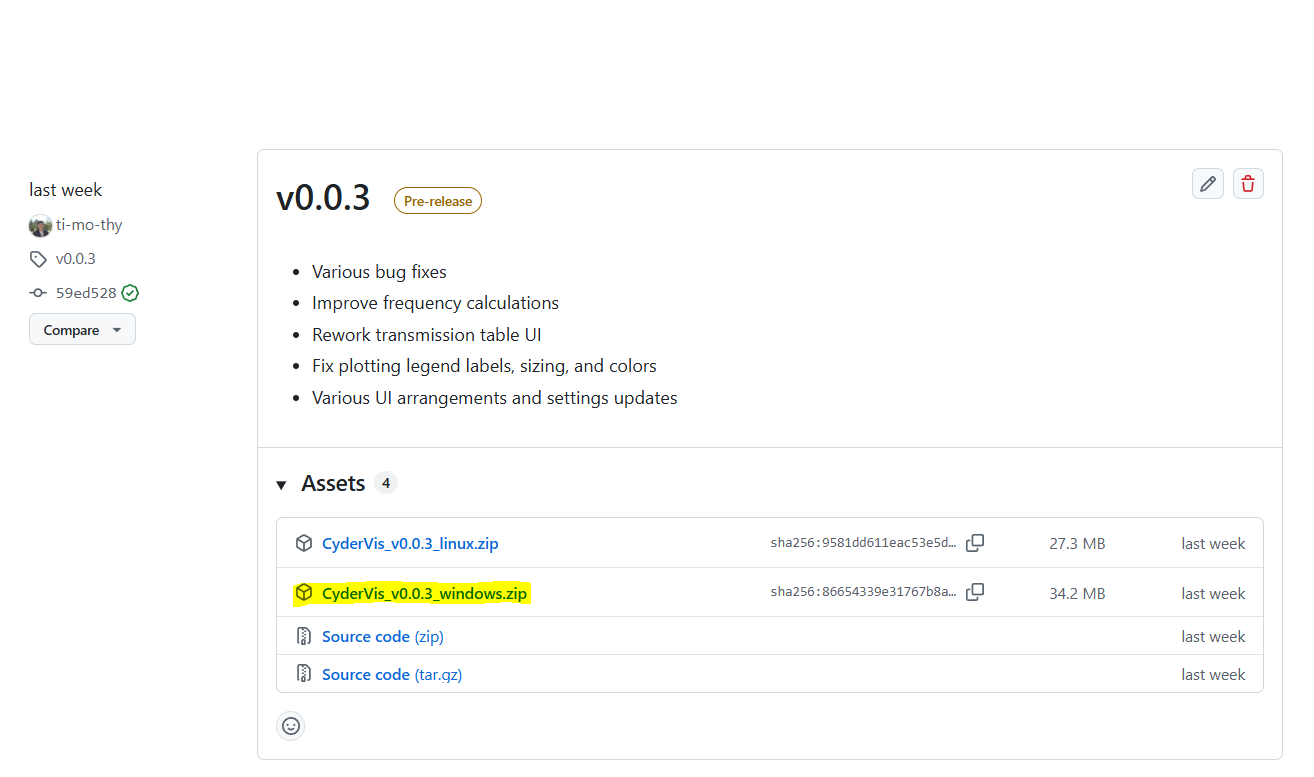
-
Extract the downloaded
.zipfile to your preferred location. -
Run the executable file:
CyderVis_vx.x.x_windows.exe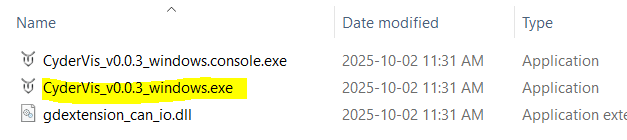
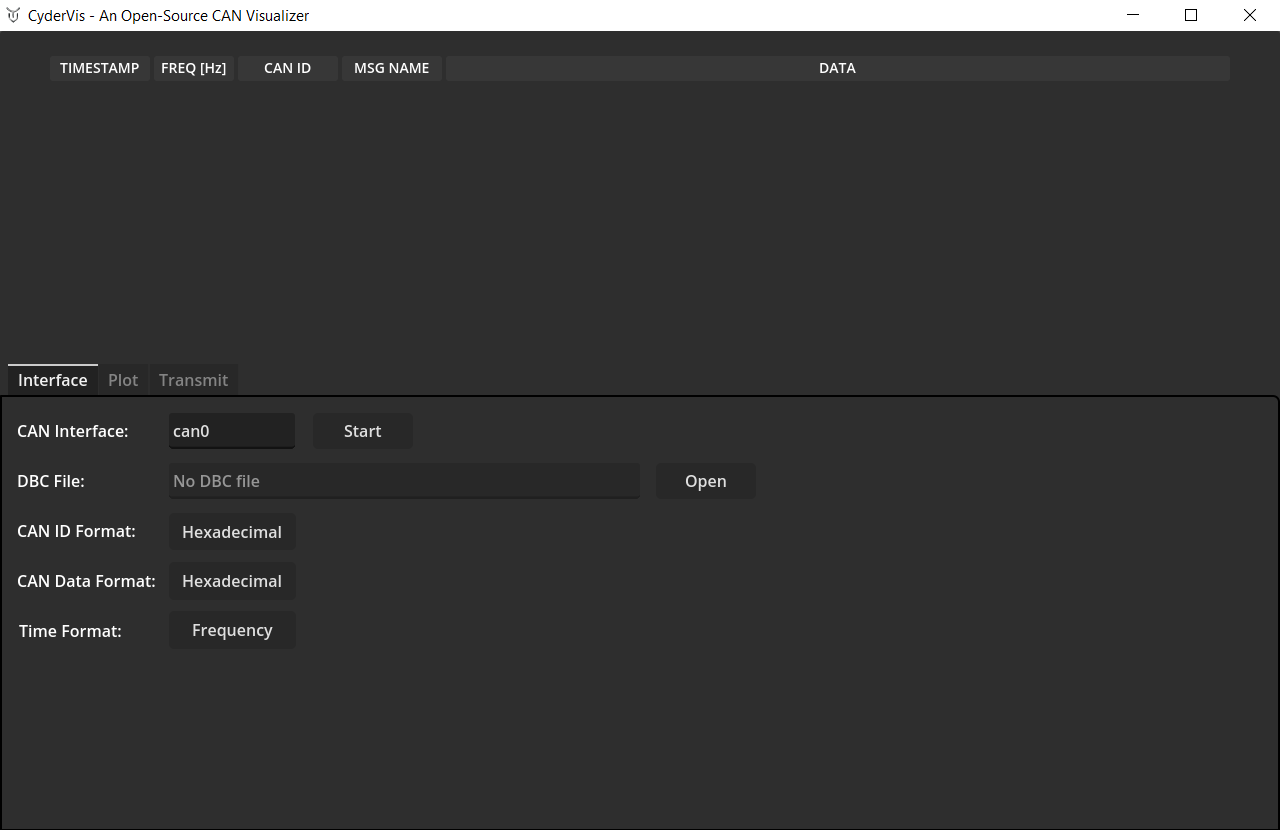
Once launched, the CyderVis window will open:
Step 3: Start a CAN Server
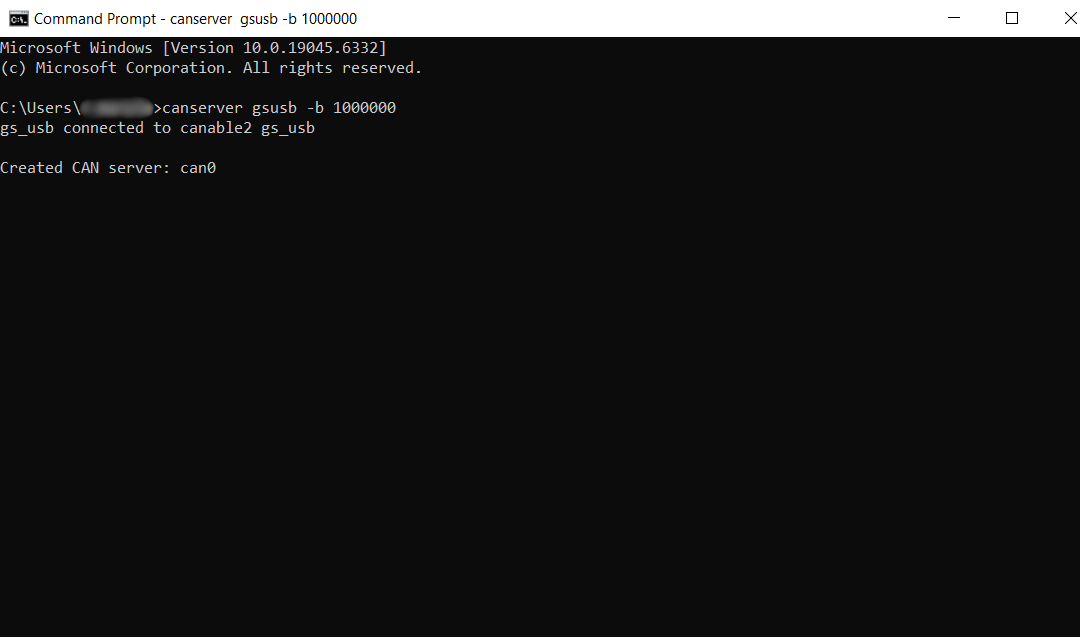
With your USB CAN adapter connected, start a CAN server using win-can-utils:
# Example: start a server for a gsusb (candleLight) device with a bitrate of 1 Mbps
canserver gsusb -b 1000000
This will start the CAN interface (usually named can0 by default).
💡 Note:
Thecanservermust remain running while CyderVis is active.
If you close it, CyderVis will lose connection to the CAN interface.
User Guide
With the CAN interface up, move on to the CyderVis User Guide